
8. May 2026
How to Customize Blog Posts in MyWebsite Now
To write a blog article that is versatile in structure and entertaining for readers, you can give free rein to your creativity with a range of features. Here is an overview of the most important functions:
With our blogging-feature, you can add headings, paragraphs, lists and images. Here are the most important features and shortcuts:
Adding Content
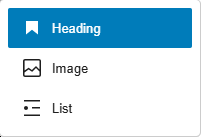
The blog posts of MyWebsiteNow work in a consecutive block system - so within your post, you generally work from the top towards the bottom. As every headings, paragraph, list or image are in their own contained block, you can add a new block anytime before or after another block. To add any of the above mentioned blocks, you have two options. You can either simply hover over an empty area to bring up the orange plus, the "Block Inserter" or type "/" as the first letter in an empty row. This reveals the component popover, enabling you to choose any of the three options. As paragraphs are the default options, they are created by adding a new line or pressing "Enter".

How to Customize Paragraphs
There are several options available when it comes to changing your paragraphs. You can choose the alignment, the text decorations, add a link and delete the entire paragraph. If, while writing your paragraph you want to convert it to a heading or a list, click on the "Paragraph" icon on the toolbar to bring up the transformation option.

How to Customize Headings
The customization options for headings are quite similar to the ones for paragraphs. Furthermore, here you also have the option to change the level of the heading, starting with "h1" (which is typically reserved for titles) and ending with "h6". Just like in the paragraph block, here you also can transform the block back into a paragraph and into a list by clicking on "Heading" in the toolbar.
Inserting and Customizing Images
Adding an image to your post works differently compared to inserting headings or paragraphs. You choose the image block via the two available options, revealing the empty placeholder. Via the "Upload" button you can now choose an image from your filesystem. Alternatively, you can also drag and drop an image into the container. Once added, you have several options of customization. The size is easily adjustable by clicking on the picture and dragging the right side or bottom. Furthermore, you can: change the style of the outline, align the image, insert a link, edit the clipping, add a caption, replace or delete the image and add SEO and accessibility relevant details.
Important: to change the featured image, you need to add the image via the sidebar on the left. If no featured image is explicitly chosen, the preview will show the first image in the post (if one is available) or show no preview image in the overview page at all.
Customizing Lists
Lastly, you can, on top of the regular stylizations, ...
- ... include an unnumbered list item (outdent)
- ... include an unnumbered list item (indented)
- ... add a numbered list.
The Sidebar - Further Customizations
General post information can be added via the sidebar on left. You can the aforementioned featured image, include an excerpt to optimize for search engines and you can enable the option for visitors of your site to leave comments. How to manage these globally is explained in our post on creating and managing blog posts.
Almost done...
Congrats, now you know how to individualize your blog post! But how do you write a compelling post? More insights on that can be found in our post "How to Optimize Blog Posts for Readers and Search Engines".
Have a question on the ins and outs of how to create a blog post? Then head over to our post "How to Create and Manage Blog Posts".